Final – Shira

For my final I created a computational and interactive reading of A Thousand Plateaus — a philosophical book written in 1980 by Deleuze and Guattari. The first “plateau” or chapter of the book is entitled “The Rhizome” and lays the framework for the structure of their overall and book and the method of inquiry which they’re proposing. Most fundamental to the rhizome is its anti-linear method, as such the reader is invited to read each plateau in any particular order.

To actualize the rhizomatic ambitions of the book, I created a program which allows users to click into circles/buttons, prompting a paragraph from the chapter will be read out loud to them, at randomThe image is the illustration from the chapter within the book–a piano piece written for David Tudor, an early experimental artist and composer, whose work could definitely be said to be rhizomatic.

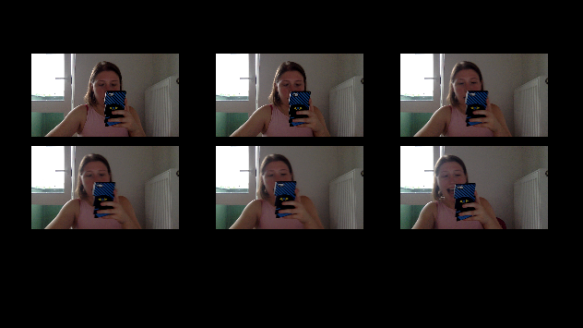
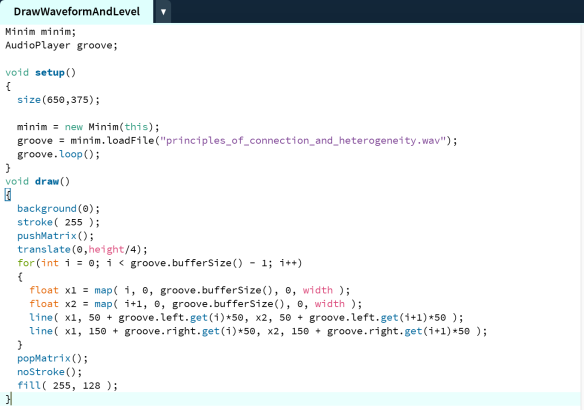
To achieve this randomized effect, I created an array of movies, where each movie was a sound clip of a paragraph being read out loud, and its accompanying sound waves–to further the overall connection to music and composition within the original book. I found the code for the wavelength within the examples from the Minim library, and altered it a little bit to make it fit better in terms of aesthetics into my own project.

Screen Shot 2016-07-03 at 8.27.56 PM.png

Creating an array of movies, to be called at random was the next step. Here, void randomClip was a function I created:

Movie [] mymovies = new Movie [7];

void setup(){

for (int i = 0; i<mymovies.length; i++) {
int tempNum = i+1;
String movieName = tempNum+”.mp4″;
mymovies[i] = new Movie (this, movieName);
}

void randomClip() {
//stop everything else
for (int i=0; i<mymovies.length; i++) {
mymovies[i].stop();
}
//randomize a number corresponding to video
int randomNum = floor(random(0, 7));
moviePlayingNow = randomNum;
//call movie to play
mymovies[moviePlayingNow].play();
state = 1;
}

The final step for putting it all together was adding a home prompt screen and then different “states” within the code, to allow the user to switch between the home page, the illustration with the bubbles, and the screen of the wavelength chapter clip. The home screen I added is a quote from Brian Massumi, who translated and wrote the foreword for the most recent translation of A Thousand Plateaus, offering a way to read or here, play, the book:

 How should A Thousand Plateaus be played? When you buy a record there are always cuts that leave you cold. You skip them. You don’t approach a record as a closed book that you  have to take or leave. Other cuts you may listen to over and over again. They follow you. You find yourself humming them under your breath as you go about your daily business.

The full code for the program can be found below!

import processing.video.*;
Movie [] mymovies = new Movie [7];
PImage img;
PImage img1;
int moviePlayingNow = 0;

int state = 3;

void setup() {
size(650, 375);
background(255, 224, 193);
img1 = loadImage(“new.png”);
img = loadImage(“rhizome.png”);
img1.resize(550, 0);
image(img1, 70, 30);
for (int i = 0; i<mymovies.length; i++) {
int tempNum = i+1;
String movieName = tempNum+”.mp4″;
mymovies[i] = new Movie (this, movieName);
}
}

void draw() {
background(255, 224, 193);

if (state == 3) {
image(img1, 70, 30);
} else if (state == 0) {
startScreen();
} else if (state == 1) {
image(mymovies[moviePlayingNow], 25, 14, 600, 340);
if(mymovies[moviePlayingNow].time()>mymovies[moviePlayingNow].duration()-.1){
state=0;
}
}
println(state);
println(mouseX);
println(mouseY);
}

void mouseClicked() {

if (state==1) {
mymovies[moviePlayingNow].stop();
state = 0;
} else if (state==0) {
//bubble 1
if (mouseX>168 && mouseX<193
&& mouseY>128 && mouseY<161) {
randomClip();
}
//bubble 2
if (mouseX>263 && mouseX<284
&& mouseY>226 && mouseY<243) {
randomClip();
}
//bubble 3
if (mouseX>304 && mouseX<326
&& mouseY>104 && mouseY<126) {
randomClip();
}
//bubble 4
if (mouseX>358 && mouseX<382
&&mouseY>167 && mouseY<190) {
randomClip();
}
//bubble 5
if (mouseX>425 && mouseX<442
&& mouseY>139 && mouseY<157) {
randomClip();
}
//bubble 6
if (mouseX>510 && mouseX<540
&& mouseY>96 && mouseY<124) {
randomClip();
}
//bubble 7
if (mouseX>534 && mouseX<564
&& mouseY>174 && mouseY<200) {
randomClip();
}
}
}
//void mousePressed() {

//}

void keyPressed() {
if (keyPressed && (key == CODED)) {
if (keyCode == RIGHT) {
state = 0;
image(img, 25, 15);
}
}
}
//Play random video from array of videos
void randomClip() {
//stop everything else
for (int i=0; i<mymovies.length; i++) {
mymovies[i].stop();
}
//randomize a number corresponding to video
int randomNum = floor(random(0, 7));
moviePlayingNow = randomNum;
//call movie to play
mymovies[moviePlayingNow].play();
state = 1;
}

//Start screen with quotes to rhizome screen
void startScreen() {
image(img, 25, 15);
}

void movieEvent(Movie m) {
m.read();
}

Week 5: Final

This week was all about prepping for our final projects. I did a sketch board of the two ideas I initially had on hand. One was to create a push button game that would activate different clips of actor Bill Murray saying one word. They would be ordered in a way that would create different sentences if pushed in sequence. My other idea was to have a different clip of Bill Murray come up in reaction to the volume of the person around.At the time, I didn’t really think the latter idea through but choose it because liked the idea of getting to use a sound sensor for the first time. I later learned that the minim library in Processing in conjunction with the computers microphone was functionally better than the sensor we had on hand for sound.

I explored the minim library and tried to find the best way to split up the microphone volume readings so that they would correspond to different clips. This did not work well because the readings were very sporadic, going from negative to positive within one frame at 10 frames per second.

Plus, after thinking about my idea in depth, it did not seem practical either; having someone talk to the computer at varying volumes to trigger different audio visual clips would not work well because both the person and the clip would make noise at the same time. Also, would the clip stop and another one start to play as soon as the volume was outside of a certain threshold? People can change their volume faster than a computer can recognize so the computer would lag.

Access a video of the project with the password: HaveAMurrayDay

I then quickly choose to make my project similar to the first idea I had. This was on Thursday morning so I did not have time to make an Arduino with 12 push buttons so I instead opted to use the keyPressed() function in Processing. The ‘asdf’ keys play subjects, ‘jkl;’ keys play verbs and ‘uiop’ keys play the rest of the sentence.

We did a crash course on arrays and classes on Wednesday. Unfortunately, I was unable to implement this into my sketch because I was not confident enough to do so in the given time span we had. For this reason, my sketch goes a lot slower that I want it to. I hope to go back to it later in the summer to optimize the code! In addition, I’d like to tighten up some of these clips so that the transition between the words can go a lot smoother.


Below is my code:
import processing.video.*;

Movie i;
Movie survive;
Movie theSecretMax;
Movie dogsAndCats;
Movie aBitMoreThanThat;
Movie myHouse;
Movie youTwoGuys;
Movie paid;
Movie estaban;
Movie listen;
Movie stole;
Movie suck;
Movie garfield;

PFont w; //decare font
//introduce & falseify boolean variables
boolean iPlay = false;
boolean survivePlay= false;
boolean theSecretMaxPlay= false;
boolean dogsAndCatsPlay= false;
boolean aBitMoreThanThatPlay= false;
boolean myHousePlay= false;
boolean youTwoGuysPlay = false;
boolean paidPlay = false;
boolean estabanPlay=false;
boolean listenPlay=false;
boolean stolePlay=false;
boolean suckPlay=false;
boolean garfieldPlay=false;

void setup() {
size (1080, 720);
i= new Movie (this, “Grand Budapest_I.mov”);
survive= new Movie (this, “Groundhog_Day_Survive.mov”);
theSecretMax=new Movie (this, “Rushmore_The secret max.mov”);
dogsAndCats= new Movie (this, “Ghostbusters_Dogs and cats.mov”);
aBitMoreThanThat= new Movie (this, “Lost_In_Translation_a bit more than that.mov”);
myHouse= new Movie (this, “St_Vincent_myHouse.mov”);
youTwoGuys= new Movie (this, “Caddyshack_youTwoGuys.mov”);
paid= new Movie (this, “St_Vincent_Paid.mov”);
estaban= new Movie (this, “Life_Aquatic_Estaban.mov”);
listen=new Movie (this,”Murray_Listen.mov”);
stole=new Movie (this, “Stripes_stole.mov”);
suck=new Movie (this, “Murray_suck.mov”);
garfield=new Movie(this,”Murray_Garfield.mp4″);

w = createFont(“Arial”,50,true); //create font

background(100,200,100);
}
void draw () {
// Text with Instructions
textFont(w,50);
fill(0);
textAlign(CENTER);
text(“What Will Bill Murray Say?”,540,330); // STEP 5 Display Text
textFont(w,40);
text(“Use one key from ‘a-s-d-f’, one from ‘j-k-l-;'”,540,400);
text(“and one from ‘u-i-o-p’ respectively to find out!”,540,450);
textFont(w,25);
text(“(give it a moment; still learning how to optimise the code!)”,540,490);

if (iPlay == true) {
image(i, -100, 0);
}
if (survivePlay == true) {
image(survive, 0, 0);
}
if (theSecretMaxPlay == true) {
image(theSecretMax, 0, 0);
}
if (dogsAndCatsPlay == true) {
image(dogsAndCats, 0, 0);
}
if (aBitMoreThanThatPlay == true) {
image(aBitMoreThanThat, 0, 0);
}
if (myHousePlay == true) {
image(myHouse, 0, 0);
}
if (youTwoGuysPlay == true) {
image(youTwoGuys, 0, 0);
}
if (paidPlay == true) {
image(paid, 0, 0);
}

if (estabanPlay== true) {
image(estaban, -100,0);
}

if(listenPlay== true) {
image(listen,100,150);
}

if(stolePlay== true) {
image(stole,0,0);
}

if(suckPlay== true) {
image(suck,0,0);
}

if(garfieldPlay==true) {
image(garfield,0,0);
}

}

void movieEvent(Movie m) {
m.read();
}
void keyPressed() {
{
//whenever these keys are pressed, a clip of Bill Murray
//saying one word or a phrase will play.
//asdf(subject)
if ( key == ‘a’ ) {
i.play();
iPlay = true;
} else {
i.stop();
iPlay = false;
}
if ( key == ‘s’ ) {
youTwoGuys.play();
youTwoGuysPlay = true;
} else {
youTwoGuys.stop();
youTwoGuysPlay = false;
}

if (key == ‘d’ ) {
estaban.play();
estabanPlay=true;
}else{
estaban.stop();
estabanPlay = false;
}

if (key==’f’) {
garfield.play();
garfieldPlay=true;
}else{
garfield.stop();
garfieldPlay=false;

// jkl;(verb)
if ( key == ‘j’ ) {
survive.play();
survivePlay = true;
} else {
survive.stop();
survivePlay = false;

}

if ( key == ‘k’ ) {
listen.play();
listenPlay=true;
} else {
listen.stop();
listenPlay=false;
}

if ( key == ‘l’ ) {
stole.play();
stolePlay=true;
} else {
stole.stop();
stolePlay=false;
}

if ( key == ‘;’ ) {
suck.play();
suckPlay=true;
} else {
suck.stop();
suckPlay=false;
}

//uiop (rest)
if (key==’u’) {
aBitMoreThanThat.play();
aBitMoreThanThatPlay=true;
} else {
aBitMoreThanThat.stop();
aBitMoreThanThatPlay=false;
}

if (key==’i’) {
theSecretMax.play();
theSecretMaxPlay=true;
}else{
theSecretMax.stop();
theSecretMaxPlay=false;
}

if (key==’o’) {
dogsAndCats.play();
dogsAndCatsPlay=true;
}else{
dogsAndCats.stop();
dogsAndCatsPlay=false;
}

if (key==’p’) {
myHouse.play();
myHousePlay=true;
}else{
myHouse.stop();
myHousePlay=false;
}
}
}
}

Kaitlin – week 5

Most of this week, I have been playing around with the possibilities of the video and opencv libraries for processing. Loosely inspired by this character from the Mighty Boosh TV series, I have the goal of placing the user’s face inside the moon.
//giphy.com/embed/qBUOTxKwa6hhK

via GIPHY

Having no experience  with computer vision, I just started by seeing what effects I could combine- I wound up using mostly background subtraction, thresholding, and contouring in order to transform the user’s face into something resembling moon craters. By layering an animation of a spinning moon, which I also processed with the opencv filters, I could add more motion and start to create the illusion of a sphere. Finally, I used an image mask tracked to the user’s face to further add depth, and hide the background.


//libraries needed: opencv, video, java
import gab.opencv.*;
import processing.video.*;
import java.awt.*;
PImage moonMask4; //filename for mask used to cover up ouside of moon region
int maskWidth = 0;
int maskHeight = 0;
Movie moonspin; //mp4 file of spinning moon
int moonPosX = 0;
int moonPosY = 0;
int moonDiameter = 0;
int moonRadius = 0;
Capture video; //input from webcam
OpenCV opencv; //opencv instance to deal with webcam
OpenCV opencv2; //opencv instance to deal with moon video
int vidWidth=0; //webcam parameters
int vidHeight=0;
void setup() {
vidWidth = 640;
vidHeight = 480;
size(640, 480);
// mask is just a png that gets placed over sketch… a better way perhaps?
moonMask4 = loadImage("moonMask4.png");
maskWidth = 1280;
maskHeight = 960;
moonspin = new Movie(this, "moonrotate.mp4");
opencv2 = new OpenCV(this, 240, 240);
moonspin.loop();
//moonspin.play();
opencv2.startBackgroundSubtraction(5, 3, 0.5);
video = new Capture(this, vidWidth, vidHeight);
opencv = new OpenCV(this, vidWidth, vidHeight);
opencv.startBackgroundSubtraction(5, 3, .5);
opencv.loadCascade(OpenCV.CASCADE_FRONTALFACE);
video.start();
frameRate(30);
}
void draw() {
//tried to do this section in a for loop but was unsuccessful
//each contour set needs its own name so nested for loop was unsuccessful
//next three sections are the contours to make "moon craters" from your face
noFill();
opencv.loadImage(video); //webcam
opencv.threshold(70);
opencv.dilate();
opencv.erode();
stroke(20);
strokeWeight(1);
for (Contour contour3 : opencv.findContours()) {
contour3.draw();
}
opencv.loadImage(video);
opencv.threshold(110);
opencv.dilate();
opencv.erode();
stroke(255);
strokeWeight(1);
for (Contour contour2 : opencv.findContours()) {
contour2.draw();
}
opencv.loadImage(video);
opencv.threshold(95);
opencv.dilate();
opencv.erode();
stroke(60);
strokeWeight(1);
for (Contour contour1 : opencv.findContours()) {
contour1.draw();
}
//face detection happening here
opencv.loadImage(video);
Rectangle[] faces = opencv.detect();
println(faces.length);
//the ellipse that goes around the face
for (int i = 0; i < faces.length; i++) {
println(faces[i].x + "," + faces[i].y);
ellipseMode(CORNER);
moonPosX = faces[i].x;
moonPosY = faces[i].y;
moonDiameter = faces[i].width;
moonRadius = moonDiameter/2;
fill(255, 10);
noStroke();
ellipse(moonPosX, moonPosY, 240, 240);
}
//masking shape
pushMatrix();
translate(moonPosX+moonRadius, moonPosY+moonRadius);
blendMode(BLEND);
image(moonMask4, -maskWidth/2, -maskHeight/2);
popMatrix();
//spinning moon video
opencv2.loadImage(moonspin);
opencv2.updateBackground();
opencv2.dilate();
opencv2.erode();
fill(0, 30);
blendMode(BLEND);
rect(0, 0, width, height);
noFill();
strokeWeight(.5);
stroke(255);
println(moonRadius);
pushMatrix();
translate(moonPosX+moonRadius, moonPosY+moonRadius);
pushMatrix();
translate(-120, -120);
for (Contour contour : opencv2.findContours()) {
// blendMode(ADD);
contour.draw();
}
//ellipse for outline of moon, jittered slightly
noFill();
stroke(255, 90);
noSmooth();
strokeWeight(1);
ellipseMode(CORNER);
ellipse(0+random(-1, 1), 0+random(-1, 1), 240, 240);
popMatrix();
popMatrix();
}
//need voids for webcam and movie
void captureEvent(Capture c) {
c.read();
}
void movieEvent(Movie m) {
m.read();
}

view raw

gistfile1.txt

hosted with ❤ by GitHub

In further experimentation, I wanted to add some kind of background to the sketch. Using arrays, I placed points to create a kind of starfield effect. But something happens when you push a button on the arduino!


//libraries needed: opencv, video, java, arduino, serial
import gab.opencv.*;
import processing.video.*;
import java.awt.*;
import cc.arduino.*;
import processing.serial.*;
Arduino arduino;
//starfield
int starNum = 400;
float [] xpos = new float[starNum];
float [] ypos = new float[starNum];
int starInstance = 0;
int startingPointX= 350;
int startingPointY= 350;
int startingPointX1= 0;
int startingPointY1= 0;
int refreshPoint = 100;
PImage moonMask4; //filename for mask used to cover up ouside of moon region
int maskWidth = 0;
int maskHeight = 0;
Movie moonspin; //mp4 file of spinning moon
int moonPosX = 0;
int moonPosY = 0;
int moonDiameter = 0;
int moonRadius = 0;
Capture video; //input from webcam
OpenCV opencv; //opencv instance to deal with webcam
OpenCV opencv2; //opencv instance to deal with moon video
int vidWidth=0; //webcam parameters
int vidHeight=0;
void setup() {
//starfield stuff
{
for (starInstance = 0; starInstance<starNum; starInstance++) {
//startingPointX = moonPosX+300;
//startingPointY = moonPosX+300;
xpos[starInstance] = int(random(-startingPointX, startingPointX));
ypos[starInstance] = int(random(-startingPointY, startingPointY));
}
}
//arduino stuff
arduino = new Arduino(this, Arduino.list()[2], 57600);
//arduino pin 7
arduino.pinMode(7, Arduino.INPUT);
arduino.pinMode(3, Arduino.OUTPUT);
vidWidth = 640;
vidHeight = 480;
size(640, 480);
// mask is just a png that gets placed over sketch… a better way perhaps?
moonMask4 = loadImage("moonMask4.png");
maskWidth = 1280;
maskHeight = 960;
moonspin = new Movie(this, "moonrotate.mp4");
opencv2 = new OpenCV(this, 240, 240);
moonspin.loop();
//moonspin.play();
opencv2.startBackgroundSubtraction(5, 3, 0.5);
video = new Capture(this, vidWidth, vidHeight);
opencv = new OpenCV(this, vidWidth, vidHeight);
opencv.startBackgroundSubtraction(5, 3, .5);
opencv.loadCascade(OpenCV.CASCADE_FRONTALFACE);
video.start();
frameRate(30);
}
void draw() {
//tried to do this section in a for loop but was unsuccessful
//each contour set needs its own name so nested for loop was unsuccessful
//next three sections are the contours to make "moon craters" from your face
noFill();
opencv.loadImage(video); //webcam
opencv.threshold(70);
opencv.dilate();
opencv.erode();
stroke(20);
strokeWeight(1);
for (Contour contour3 : opencv.findContours()) {
contour3.draw();
}
opencv.loadImage(video);
opencv.threshold(110);
opencv.dilate();
opencv.erode();
stroke(255);
strokeWeight(1);
for (Contour contour2 : opencv.findContours()) {
contour2.draw();
}
opencv.loadImage(video);
opencv.threshold(95);
opencv.dilate();
opencv.erode();
stroke(60);
strokeWeight(1);
for (Contour contour1 : opencv.findContours()) {
contour1.draw();
}
//face detection happening here
opencv.loadImage(video);
Rectangle[] faces = opencv.detect();
println(faces.length);
//the ellipse that goes around the face
for (int i = 0; i < faces.length; i++) {
println(faces[i].x + "," + faces[i].y);
ellipseMode(CORNER);
moonPosX = faces[i].x;
moonPosY = faces[i].y;
moonDiameter = faces[i].width;
moonRadius = moonDiameter/2;
fill(255, 10);
noStroke();
ellipse(moonPosX, moonPosY, 240, 240);
}
//masking shape
pushMatrix();
translate(moonPosX+moonRadius, moonPosY+moonRadius);
blendMode(BLEND);
image(moonMask4, -maskWidth/2, -maskHeight/2);
popMatrix();
//spinning moon video
opencv2.loadImage(moonspin);
opencv2.updateBackground();
opencv2.dilate();
opencv2.erode();
fill(0, 30);
blendMode(BLEND);
rect(0, 0, width, height);
noFill();
strokeWeight(.5);
stroke(255);
println(moonRadius);
pushMatrix();
translate(moonPosX+moonRadius, moonPosY+moonRadius);
pushMatrix();
translate(-120, -120);
for (Contour contour : opencv2.findContours()) {
// blendMode(ADD);
contour.draw();
}
//ellipse for outline of moon, jittered slightly
noFill();
stroke(255, 90);
noSmooth();
strokeWeight(1);
ellipseMode(CORNER);
ellipse(0+random(-1, 1), 0+random(-1, 1), 240, 240);
popMatrix();
popMatrix();
//using a button press to create the starfield around moon
starField();
}
//need voids for webcam and movie
void captureEvent(Capture c) {
c.read();
}
void movieEvent(Movie m) {
m.read();
}
void starField() {
blendMode(ADD); //otherwise moon face will be covered up
fill(0,10);
noStroke();
rect(0,0,width,height);
if(arduino.digitalRead(7) == Arduino.HIGH) {
arduino.digitalWrite(3, 100);
pushMatrix();
translate(width/2, height/2);
colorMode(HSB);
tint(random(1,255),250,250);
for (starInstance = 0; starInstance < starNum; starInstance ++) {
strokeWeight(random(1,4));
stroke(random(1,255),200,200,starInstance);
point(xpos[starInstance], ypos[starInstance]);
xpos[starInstance]= xpos[starInstance]+(xpos[starInstance])/100.0;
ypos[starInstance]= ypos[starInstance]+(ypos[starInstance])/100.0;
if ((xpos[starInstance] < -width) || (xpos[starInstance] > width) ||
(ypos[starInstance] < -height) || ( ypos[starInstance] > height)) {
xpos[starInstance] = random(-refreshPoint, refreshPoint);
ypos[starInstance] = random(-refreshPoint, refreshPoint);
}
}
popMatrix();
}
else{
noTint();
arduino.digitalWrite(3, 0);
pushMatrix();
translate(width/2, height/2);
for (starInstance = 0; starInstance < starNum; starInstance ++) {
strokeWeight(1);
stroke(255,starInstance);
point(xpos[starInstance], ypos[starInstance]);
xpos[starInstance]= xpos[starInstance]+(xpos[starInstance])/100.0;
ypos[starInstance]= ypos[starInstance]+(ypos[starInstance])/100.0;
if ((xpos[starInstance] < -width) || (xpos[starInstance] > width) ||
(ypos[starInstance] < -height) || ( ypos[starInstance] > height)) {
xpos[starInstance] = random(-refreshPoint, refreshPoint);
ypos[starInstance] = random(-refreshPoint, refreshPoint);
}
}
popMatrix();
}
}

This week’s exercises:
Controlling an LED connected to arduino with mouse input from Processing
//giphy.com/embed/xT8qAYKcXvbJzsQQ2Q

via GIPHY

Controlling a processing sketch with button input from arduino
//giphy.com/embed/xT8qAX48hTUS2GZHi0

via GIPHY

Shira – Week 5 Documentation

For this weeks assignments, I wanted to connect Arduino and Processing to create a Photo Booth-like experience: when you press the button on Arduino, it takes an image (using the computer’s built in camera) and then when you press a key, it shows  6 photos that you’ve taken in a strip.

To get the camera set up into Processing, I imported the video library:

import processing.video.*;

Capture cam;

void setup(){
cam = new Capture (this);
cam.start();
counter= 0;
size (640,360);

To get communication happening between the Arduino and Processing, I imported the Firmata library, as well as a few other lines of code to ensure they speak to one another:

import processing.serial.*;
import cc.arduino.*;
import org.firmata.*;

Arduino arduino;

void setup(){
arduino = new Arduino (this, Arduino.list()[1], 57600); //port 1
println(Arduino.list()[1]);
arduino.pinMode(7, Arduino.INPUT); //button connected through pin 7
}

Using these lines of code, I was able to take an image whenever the button was pressed:

void draw(){
if (cam.available()){
cam.read();
}
image(cam,0,0,(cam.width/2),(cam.height/2));
if (arduino.digitalRead(7) == Arduino.HIGH){
counter++;
saveFrame(“capture-“+counter+”.png”);
}

Then, using a simple keyPressed/if function, I displayed the images like a photo strip:

if (keyPressed){
a = loadImage(“capture-1.png”);
b = loadImage(“capture-2.png”);
c = loadImage(“capture-3.png”);
d = loadImage(“capture-4.png”);
e = loadImage(“capture-5.png”);
f = loadImage(“capture-6.png”);

noLoop();
background(0);
image(a, 40, 60, a.width/4, a.height/4);
image(b, 240, 60, b.width/4, b.height/4);
image(c, 440, 60, c.width/4, c.height/4);
image(d, 40, 160, d.width/4, d.height/4);
image(e, 240,160, e.width/4, e.height/4);
image(f, 440, 160, f.width/4, f.height/4);
}

Obviously there are ways to make this code more efficient: importing the images into an Array being the be big one. I also wanted to add a way to refresh the program (meaning deleting the saved images in the data folder) but wasn’t able to figure it out. One more thing I’d want to add would be an opening screen and numbers showing up each time a photo was taken, to add to the overall experience.

Screen Shot 2016-06-25 at 7.24.32 PM.png

IMG_8937.JPG

Full code below

Continue reading

Tanya Gupta – Week 4 Documentation

This week was an introduction to a host of new technologies and skills. We worked more closely with Serial connection between Arduino and Processing, first using Firmata, and then by use of our own code. We also got to connect built-in and external webcams as feeds for Processing sketches, as well as other extraneous hardware such as the Leap Motion and the Microsoft Kinect. With a field trip to the Computerspielemuseum just in time for this week’s content, we were able to see first-hand the kinds of hardware communications that have been used since as early as the 70’s for arts and entertainment.

The following is a video of my first Serial connection using the Firmata library, with a code (from notes) to light up the LED with a delay:


In this example below, a Processing sketch is used in place of an LED, and the purple rectangle is programmed to appear when the button is pushed:

Code for the above video:

import processing.serial.*;
import cc.arduino.*;
import org.firmata.*;

Arduino arduino;
void setup() {
size (500, 500);
arduino = new Arduino(this, Arduino.list()[2], 57600);
println(Arduino.list()[2]);
arduino.pinMode(7, Arduino.INPUT);
}
void draw() {
background(170,255,255);
if (arduino.digitalRead(7) == Arduino.HIGH) {
noStroke();
fill(145,45,255);
rect(100, 100, 300, 300);
}
}


The following works sort of in reverse; by moving your cursor across a sketch of a black-to-white gradient, you control the dimness or brightness of the LED on the Arduino. [Note: The pushbutton is still on the breadboard, however it is not relevant to this specific program]


The following was my first use of the OpenCV library by use of my laptop webcam as a visual input. The purpose of this animation was for the OpenCV program to detect a face, then resize a png of Kylie Jenner’s face to the size of the detected face, and to place that resized face over the user’s. [Note: Not shown below, but with some playing around I discovered that the sketch can recognize more than one face!]

Code for above video:

import processing.video.*;
import gab.opencv.*;
import java.awt.Rectangle;

OpenCV opencv;
Capture cam;

Rectangle[] faces;

void setup() {
size(320, 240, P2D);

// start capture
cam = new Capture(this, 320, 240);
cam.start();

opencv = new OpenCV(this, cam.width, cam.height);
opencv.loadCascade(OpenCV.CASCADE_FRONTALFACE);
faces = opencv.detect();
}

void captureEvent(Capture cam) {
cam.read();
}

void draw() {
background(0);

// load camera feed to OpenCV
opencv.loadImage(cam);
// detect face
faces = opencv.detect();
image(cam, 0, 0);

// load png of Kylie’s face
PImage img;
img = loadImage(“kylie.png”);

// if face detected, adjust png size to fit face and place over face
if (faces != null) {
for (int i = 0; i < faces.length; i++) {
//rect(faces[i].x, faces[i].y, faces[i].width, faces[i].height);
img.resize(faces[i].width, faces[i].height);
image(img, faces[i].x, faces[i].y);
}
}
}


Finally, the last project I worked on is an Arduino-to-Processing setup involving a pushbutton that plays a movie when pressed.


I definitely came across several hiccups in the works of making this piece, most notably that I was unable to play the video within the sketch because I had saved the video file within the folder of the sketch but not within the data folder of the sketch. In addition, there was some delay in feedback from pushbutton to Processing – that is, the button would respond quickly, but it would not begin to work until about 5 seconds after the sketch’s startup. That being said, the final result was pretty good for a first try. [Note: The fireworks movie file was downloaded from Pixabay.com, a royalty-free content website.]

Code for above video:

import processing.serial.*;
import cc.arduino.*;
import org.firmata.*;
import processing.video.*;
Movie myMovie;
Arduino arduino;

void setup() {
size(900, 315);
background(0);
myMovie = new Movie(this, “Fireworks2.mov”);
myMovie.volume(0);
arduino = new Arduino(this, Arduino.list()[2], 57600);
arduino.pinMode(7, Arduino.INPUT);
}

void draw() {
//delay(10000);
if (arduino.digitalRead(7) == Arduino.HIGH) {
myMovie.play();
image(myMovie, 0, 0);
}
}

void movieEvent(Movie myMovie) {
myMovie.read();

Ada Week 4 Assignments

In class 10 we talked about how to set up communication between Arduino and Processing. One of a few ways of doing so that we learned is by using Firmata, which is a protocol between microcontrollers and computers. Firmata setup is relatively easy compared to the other communication methods, and it is great for simple inputs and outputs.To use Firmata, we need to first download Firmata on both Arduino and Processing. We open file-example-standardFirmata, then upload to Arduino. Once uploaded, all the coding happens in Processing, where we setup processing.serial and cc.arduino from import library. For Processing to receive data from Arduino, we did an exercise where a rectangle is drawn when the button is pressed on Arduino, below is the code and video:
// data from arduino to processing

import processing.serial.*;
import cc.arduino.*;

Arduino arduino;
void setup() {
size(470, 280);
arduino = new Arduino(this, Arduino. list()[3], 57600);
println(Arduino.list()[3]);
arduino.pinMode(7, Arduino.INPUT);
}
void draw() {
background(0);
if (arduino.digitalRead(7)==Arduino.HIGH) {
rect(10, 10, 200, 200);
}
}


For Arduino to receive data from Processing, we tried the Arduino_output example in the library, when mouse is clicked in the square corresponding to pin 3, LED is turned on, below is the video:


Another method of communication between Arduino and Processing is using serial communication, which requires coding in both Arduino and Processing. Before using the Serial function in Processing we must first import the Serial library, create a serial variable, and define the port and data rate.

We did another exercise of drawing rectangle on Processing from Arduino. Below is the code for Arduino and Processing and video:

Arduino code:

int button=7;

void setup() {
Serial.begin(9600);
pinMode(button,INPUT);
}

void loop() {
int sensorValue=digitalRead(button);
Serial.write(sensorValue);
delay(2);
}

Processing code:

import processing.serial.*;
Serial myPort;

void setup(){
myPort=new Serial(this,Serial.list()[1],9600);
}
void draw(){
background(0);
while(myPort.available()>0){
int inByte = myPort.read();
println(inByte);

//if I see abyte of 1 then draw rect
if(inByte==1){
rect(20,20,20,20);
}
}
}


We also tried sending data from Processing to Arduino using serial communication. With the dimmer example, we make the LED go brighter and dimmer as the mouse moves across the processing screen, below is the video:


One thing to pay attention when writing the code in Processing is that with either Serial communication or Firmata, myPort = new Serial(this, Serial.list()[0], 9600); Arduino = new Arduino(this, Arduino.list()[0], 57600); we need to change the 0 into the port that Arduino is connected to.We also need to select that port in Arduino before uploading.


In Class 12, we learned how to import images and videos and capture live video into Processing, manipulate them using various functions like pixels[] array, image.set(), image.pixel[], tint(), etc.

Below is the code of capturing live video and making it move across the screen:

import processing.video.*;
Capture cam;

void setup() {
size(640, 240);
cam = new Capture(this);
cam.start();
}
void draw() {
if (cam.available()) {
cam.read();
}
image(cam, frameCount%width, 0, 320,240);
}

I also did a live video capture with two cameras, with each stretched vertically and one moving downward, below is the code:

//capturing two cameras

import processing.video.*;
Capture cam1;
Capture cam2;

void setup() {
size(640, 1500);
//list all the cameras available
String[] cameras =Capture.list();
if (cameras.length==0) {
println(“no cameras available.”);
exit();
} else {
println(“available cameras:”);
for (int i=0; i < cameras.length; i++) {
println(i+” “+cameras[i]);
}
// The camera can be initialized directly using an
// element from the array returned by list():

cam1 = new Capture(this, cameras[0]);
cam1.start();

cam2 = new Capture(this, cameras[2]);
cam2.start();
}
}

void draw() {
if (cam1.available() == true) {
cam1.read();
}
image(cam1, 0, frameCount%height, width/2, height);

if (cam2.available() == true) {
cam2.read();
}
image(cam2, width/2, 0, width/2, height);
}


For the assignment, I created a simple VJ controller, sending signal from Arduino parts to Processing to apply different visual effects on the video clip. I set up the Arduino circuit as shown in the picture: there are four buttons, controlling the color effects and one potentiometer controlling scaling and another one the rotation of the video. I uploaded standardFirmata example to Arduino. Then I imported a video onto Processing, assigned pin numbers to buttons and potentiometers and defined their features, using tint(), rotate(), and scale().

One problem I experienced was when I imported my video from the right data folder in the sketch folder, the video wouldn’t play. I later found out that the video I imported is not compatible with Processing because Processing only supports certain codecs. So I changed the codec of the video to make it compatible.

Below is the code and video:

import processing.serial.*;
import cc.arduino.*;
Arduino arduino;

import processing.video.*;
Movie myMovie;

int r, g, b, degree;
float s;
int analogPin0=0;
int analogPin1=1;

void setup() {
size(768, 432);
//import movie
myMovie = new Movie(this, “lines2.MOV”);
myMovie.play();
myMovie.loop();

arduino = new Arduino(this, Arduino.list()[1], 57600);
// Set the Arduino digital pins as inputs.
arduino.pinMode(6, Arduino.INPUT);
arduino.pinMode(7, Arduino.INPUT);
arduino.pinMode(8, Arduino.INPUT);
arduino.pinMode(9, Arduino.INPUT);
//initialize color values
r=255;
g=255;
b=255;
}
void draw() {
background(0);
tint(255);
pushMatrix();
translate(width/2, height/2);

//potentiometer0 controls rotation of the movie
degree = floor(map(arduino.analogRead(analogPin0), 0, 1001, 0, 360));//map analogPin2 value with degree of rotation
rotate(radians(degree));

//potentiometer1 controls scaling of the movie
float s= map(arduino.analogRead(analogPin1), 0, 1001, 0.1, 3); //map analogPin1 value with scale value
scale(s);

translate(-width/2, -height/2);
//button7 randomizes r and g values of the tint
if (arduino.digitalRead(7) ==Arduino.LOW) {
r=floor(random(0, 255));
g=floor(random(0, 255));
tint(r, g, 255);
//button8 randomizes r and b values of the tint
} else if (arduino.digitalRead(8) ==Arduino.LOW) {
r=floor(random(0, 255));
b=floor(random(0, 255));
tint(r, 255, b);
//button9 randomizes g and b values of the tint
} else if (arduino.digitalRead(9) ==Arduino.LOW) {
g=floor(random(0, 255));
b=floor(random(0, 255));
tint(255, g, b);
} else {
tint(r, g, b);
}

//draw moive
image(myMovie, 0,0,768,432);
popMatrix();

//button6 controls strobing effect
if (arduino.digitalRead(6) ==Arduino.LOW) {
fill(255);
rect(-500, -500, 2000, 2000);
}
println (arduino.analogRead(analogPin0), ” “, arduino.analogRead(analogPin1));
}

void movieEvent(Movie m) {
m.read();
}


Week 4:Serial Comm., Images & Video

This week we…

  • Learned how to use Firmata to connect simple Arduino projects with Processing
  • Learned how to connect Arduino and Processing using Serial Communication
  • Were introduced to the Leap, Xbox Kinect, and facial recognition software
  • Learned how to enter and manipulate video and images in Processing


For our homework, we were supposed to connect Processing and Arduino to manipulate an imported image or video. I unfortunately remiss in reading the assignment description on the blog and proceeded to instead manipulate an animation from Processing using a push button on an Arduino.

I first created a simple circuit similar to the one in the class notes for this week. It was a push button circuit with a green LED.  I connected the circuit to Processing using the Firmata libraries on both the Arduino and Processing softwares.

IMG_1867

Since I thought we were aloud to activate animations using are circuit, I decided to use the animation of Humpty Dumpty that I created last week for the midterm. My first idea was to make Humpty shake whenever the button was pressed. I worked on doing this for about 30 minutes, trying variations on the if/else statement, but I could not get this to work.

After, I decided to try a smaller task- make Humpty’s eyes light up red whenever the button is pressed. This was done with much more ease for some reason.

Password: Arduino/Processing


Below is my code. In comments at the bottom are my multiple attempts to make the random shaking work:

import processing.serial.*;

import cc.arduino.*;

Arduino arduino;

float k=0; // global variable
float c=0;
float d=0;
float b=0;
float g=0;
int x;
int y=-50;

int switchState=0;
//color off = color(4, 79, 111);
//color on = color(0, 0, 255);
void setup() {
size(500, 500);
println(Arduino.list());
arduino = new Arduino(this, Arduino.list()[1], 57600);
for (int i = 0; i <= 13; i++)
arduino.pinMode(7, Arduino.INPUT);
arduino.pinMode(3, Arduino.OUTPUT);
}

void draw() {
background(#0DCCFF);
//bricks

fill(#5F0606);
rect(0,325,500,40);
fill(#C42222);
for (int y=-30;y<500;y+=60){
rect(y,365,60,40);rect (y,445, 60,40);
}
fill(#5F0606);
for (int y=-64; y<500; y+=50) {
rect(y,405,50,40); rect (y,485, 50,40);
}

//egg body
fill(255);
ellipseMode(CENTER);
ellipse (height/2, width/2, 150, 200);
//egg eyes
//left
ellipseMode(CENTER);
ellipse(219,208, 20,30);
//right
ellipse(276,208,20,30);

//Make pupils red when button pressed
if (arduino.digitalRead(7) == Arduino.HIGH) {
fill (255,0,0); }
else {
fill(255);
}

//egg pupils
//left
pushMatrix();
g=map(mouseY, 0, 500, .8, -1);
print(mouseX);
println(mouseY);

translate(219,209);
ellipse(0,0,10,14);
//right
ellipse(57,0,10,14);

fill(#3EB959);
popMatrix();
//suit
arc(width/2,height/2,154,252,0,PI);
endShape(CLOSE);
fill(#DE98CF);
strokeWeight(2);

fill(255);
//egg thighs
//left thigh
fill(255);
//left thigh meat
pushMatrix();
translate(203, 323);
rotate(radians(22));
rect(0, 0, 12, 45);
popMatrix();

//left thigh arc
pushMatrix();
translate(209, 325);
rotate(radians(180));
arc(0, 0, 12, 12, radians(20), radians(200));
popMatrix();

//right thigh

//right thigh meat
pushMatrix();
translate(288, 328);
rotate(radians(338));
rect(0, 0, 12, 45);
popMatrix();

//right thigh arc
stroke(4);
pushMatrix();
translate(293, 325);
rotate(radians(140));
arc(0, 0, 12, 12, radians(20), radians(200));
popMatrix();

//left leg
pushMatrix();
c=map(mouseX, 0, 500, .8, -1);
translate(186, 370);
rotate(c);
rect(0, 0, 12, 50);
//left knee
ellipseMode(CENTER);
ellipse(6, -1, 14, 16);
//left shoe
ellipse(-3, 51, 30, 10);
popMatrix();

//right leg
pushMatrix();
d=map(mouseX, 0, 500, -1, .8);
translate(302,365);
rotate(d);
rect(1, -2, 12, 50);
//right knee
ellipse(8, 0, 14, 16);
//right shoe
ellipse(14, 51, 30, 10);
popMatrix();

//left arm
pushMatrix();
translate(188, 260);
k= map(mouseX, 0, 500, 3, -1);

rotate(k);
beginShape();
vertex(-8,2);
vertex(-8,50);
vertex(10, 50);
vertex(10,2);
arc(1, 1, 18, 18, radians(180), radians(360));
endShape();
popMatrix();

//right arm
pushMatrix();
translate(314, 260);
b= map(mouseX, 0, 500,-3, 1);
rotate(b);
beginShape();
vertex(-8, 1);
vertex(-7, 53);
vertex(10, 53);
vertex(10,1);
arc(01, 0, 18, 18, radians(180), radians(360));
endShape();
popMatrix();

//float m=-.5;
//float n=.5;

//if (arduino.digitalRead(7,Arduino.HIGH)) {

//if (arduino.digitalRead(7)==Arduino.HIGH)
//pushMatrix();
//translate(random(m,n),random(m,n));
////popMatrix();
//} else {
//m=0;n=0;}
//for (arduino.pinMode(7, Arduino.INPUT) {
//if (arduino.digitalRead(7)==Arduino.HIGH) {
//pushMatrix();
//translate(random(-.5,.5),random(-.5,.5));
//popMatrix();
//} else {
//pushMatrix();
//translate(random(0,0),random(0,0));
//popMatrix();
//}

////Make pupils red when button pressed
//if (arduino.digitalRead(7) == Arduino.HIGH) {
// fill (255,0,0); }
// else {
// fill(255);
//}

//if (arduino.digitalRead(7)==Arduino.HIGH)
// pushMatrix();
//translate(random(-.5,.5),random(-.5,.5));
// popMatrix();
// else
// arduino.digitalRead(7)==Arduino.LOW;

}

Shira: Midterm & IR Remote Arduino

For my midterm, I wanted to re-create Brendan Dawes’ Cinema Redux project. In this project, a movie is imported into Processing, which then takes a snapshot of the screen every second, plotting these image frames on a canvas to ultimately display the entirety of a movie, reduced to one sketch. With this type of project, patterns of colors, editing styles, and other cinematic techniques can be seen from a certain birds-eye perspective. Following these advantages, I wanted to work with Sofia Copolla’s movie, The Virgin Suicides, which, like other young Coppola films has a certain palette and aesthetic central to her technique.

To achieve this effect, 3 main functions have to be employed:

  1. Importing a movie into Processing
  2. Taking a screen shot every frame and saving that screen shot
  3. Plotting and displaying these screen shots in chronological order

The movie was imported as an object myMovie and “read” in the function movieEvent ( ). To take a screen shot every frame, I used the .save function attached to the myMovie class, using a counter variable to save each image with an incremental name:

void draw() { 
     counter++; 
     myMovie.save("data/mov-"+counter+".png”);
 }

In terms of displaying the images, I used an embedded for loop with the PImage / loadImage command inside.

for (int s =ypos; s<movieHeight; s+=capturedHeight) {
    for (int n=0; n<movieWidth; n+=capturedWidth) {
      if (i<counter) {
        PImage tempImg = loadImage("data/mov-"+i+".png");
        tempImg.resize(8,6);
        image(tempImg,n,s);
        i++;
        if (n>480) {
          n=0;
          s += capturedHeight;
        }
      }
    }

Beyond these functions, a few variables had to be set up:

  • Size of the captured image frames
  • Size of the canvas
  • A counter to save each image with an incremental name i.e. mov-1, move-2, etc.
  • Position of each plotted image

To determine the size of the canvas, I multiplied the image capture width, 8, by 60 so every row would be one minute of movie. The height was then determined by multiplying the image capture height, 6, by the number of minutes in the movie — 91.

The main problems that I ran into it weren’t necessarily issues within the code itself, but rather issues with the amount and size of data being processed — resulting in the actual program running correctly, but slowing down as more images were captured. To try and fix this, I tried a few things, such as playing around with the movie frame rate (myMovie.frameRate( ) ), the movie speed (myMovie.speed( ) ), and the frameRate within the Processing sketch itself. I also used the Image resize function to try and lighten the data weight of each image captured and displayed.

Beyond playing around with the code itself, I used Adobe Media Encoder to re-export the entirety of the movie in a smaller format size, shrinking the height/width of the file, removing the audio, and lowering the quality.

There’s definitely still some kinks with the program itself, which is to say, there’s still code to clean up to make it run more efficiently. Ideally, I’d want to be able to run this live, as opposed to needing to wait [number of images] x [seconds] for the entire canvas to fill up. To achieve this, I think it would make sense to separate the function that reads the movie and takes pictures, with the function that plots them. So when the code would start, it would be a black screen for a few seconds while the program took screen shots of every second, and once it had processed through the whole movie, then and only then would images start appearing at a faster rate.

Additionally, I’d want to add interactivity to it. I’d love to have the option of choosing between a variety of Sofia Copolla movies, and additionally have it sort by color palette rather than sequenced by time, as a possibility.

Overall, I’m happy that I was able to recreate at least partially the end effect of this project, even if the code isn’t the most efficient way to achieve this. Full code at bottom of post.

*Also realized way too late into the program running that I should have added a saveFrame at the end of the code!

**will work to clean up quality of photo as well Screen Shot 2016-06-17 at 9.59.00 PM


***********************************

Back to the Arduino, I connected an IR remote with a servo motor — meaning when I clicked certain buttons on the remote, the motor would turn in specified and correspondent directions/amounts. I’m still working to fully grasp working with the IR library installed, so while I got the motor to move, I didn’t have as much control as I would want. In order to have this control, I would need to add in a bunch of if statements mapping each value from the remote number pad to servo degrees, as I started to do here:

void loop() {

  if (irrecv.decode(&results)) {
    Serial.println(results.value);
    int degree = 90;
    if (results.value == 16607383) {
      servo.write(degree);
      delay(500);
    } else {
      servo.write(5);
      delay(10);
    }

***********************************

Continue reading

Week 3: Processing and Arduino

This week, we further studied animation in processing, worked with servo motors in Arduinos, and learned how to connect our Arduinos to Processing.

On Wednesday, I connected a temperature sensor to the Arduino. I had a bit of trouble at first in terms of completing the breadboard circuitry. I mixed up the details of temperature sensor with one from a different company when I looked online to see the specs. For this reason, I tried to add a 210 olm resistor when no resistor was needed.

Since temperature sensors are slower than many other types of sensors in terms of reading my results, I took a long time for me to see a change in the temperature of the sensor, even after holding it in my hands and blowing hot air on it. My results varied from 27 degrees C to 31 degrees C.

IMG_1805

For my midterm, I created a sketch of Humpty Dumpty in Processing.

Firstly, I created his body using ellipse(), arc() , and rect(). When trying to make the limbs rotate, I realized that it’d be easier to create the limbs in connection with the shoulders and  knees. I did not know that it was possible to use an arc in the createShape() function, and if I would’ve known this in the beginning, it would have saved a lot of time. After translating my shapes, I mapped the limbs to mouseX() and allowed them to rotate.

After I created the brick wall using multiple ‘for’ statements. And touched up the character with a bit of color. My first instinct was to make Humpty with lots of color and expression. After seeing this result, I decided to give him a minimalist look.

https://vimeo.com/171146635&nbsp;


You can view the video of my processing sketch with the password: humpty

Two things are happening that I did not expect. For one, I wanted the rock to fall after out of the sky after the click of one button. Instead, as you see from the video, the rock gets a little lower every time I click a key. Therefore the rock is suspended in the air most of the time.

Another thing was that I attempted to use a ‘if’ statement to make the egg man shake at a more intense rate every time the rock hit him. for some reason however, my ‘if’ statement is not working.

Over, I am happy with the way I worked on this project. I did a lot of problem solving with this sketch and increased my productivity in terms of how many lines of code I needed to use. I hope to return to Humpty Dumpty soon and fix him up.

below is my code:

float k=0; // global variable
float c=0;
float d=0;
float b=0;
float g=0;
int x;
int y=-50;

void setup() {
size(500, 500);
frameRate(200);
}
void draw() {

background(#07B5E8);
//bricks

fill(#5F0606);
rect(0,325,500,40);
fill(#C42222);
for (int y=-30;y<500;y+=60){
rect(y,365,60,40);rect (y,445, 60,40);
}
fill(#5F0606);
for (int y=-64; y<500; y+=50) {
rect(y,405,50,40); rect (y,485, 50,40);
}

//humpty to shake more when he is hit
if (y>=153 && y<400) {
random(-5,5);
}else {
random(-.5,.5);

}

fill(255);
//random shake
pushMatrix();
translate(random(-.5,.5),random(-.5,.5));

{

}

//egg body
ellipseMode(CENTER);
ellipse (height/2, width/2, 150, 200);

//egg eyes
//left
ellipseMode(CENTER);
ellipse(219,208, 20,30);
//riyght
ellipse(276,208,20,30);

//egg pupils
//left
pushMatrix();
g=map(mouseY, 0, 500, .8, -1);
print(mouseX);
println(mouseY);

translate(219,209);
ellipse(0,0,10,14);
//right
ellipse(57,0,10,14);

fill(#3EB959);
popMatrix();
//suit
arc(width/2,height/2,154,252,0,PI);
endShape(CLOSE);
fill(#DE98CF);
strokeWeight(2);
//tie
beginShape();
vertex(width/2, height/2+20);
vertex(width/2-10,height/2+40);
vertex(width/2, height/2+75);
vertex(width/2+10, height/2+40);
endShape(CLOSE);

fill(255);
//egg thighs
//left thigh

//left thigh meat
pushMatrix();
translate(203, 323);
rotate(radians(22));
rect(0, 0, 12, 45);
popMatrix();

//left thigh arc
pushMatrix();
translate(209, 325);
rotate(radians(180));
arc(0, 0, 12, 12, radians(20), radians(200));
popMatrix();

//right thigh

//right thigh meat
pushMatrix();
translate(288, 328);
rotate(radians(338));
rect(0, 0, 12, 45);
popMatrix();

//right thigh arc
stroke(4);
pushMatrix();
translate(293, 325);
rotate(radians(140));
arc(0, 0, 12, 12, radians(20), radians(200));
popMatrix();

//left leg
pushMatrix();
c=map(mouseX, 0, 500, .8, -1);
translate(186, 370);
rotate(c);
rect(0, 0, 12, 50);
//left knee
ellipseMode(CENTER);
ellipse(6, -1, 14, 16);
//left shoe
ellipse(-3, 51, 30, 10);
popMatrix();

//right leg
pushMatrix();
d=map(mouseX, 0, 500, -1, .8);
translate(302,365);
rotate(d);
rect(1, -2, 12, 50);
//right knee
ellipse(8, 0, 14, 16);
//right shoe
ellipse(14, 51, 30, 10);
popMatrix();

//left arm
pushMatrix();
translate(188, 260);
k= map(mouseX, 0, 500, 3, -1);

rotate(k);
beginShape();
vertex(-8,2);
vertex(-8,50);
vertex(10, 50);
vertex(10,2);
arc(1, 1, 18, 18, radians(180), radians(360));
endShape();
popMatrix();

//right arm
pushMatrix();
translate(314, 260);
b= map(mouseX, 0, 500,-3, 1);
rotate(b);
beginShape();
vertex(-8, 1);
vertex(-7, 53);
vertex(10, 53);
vertex(10,1);
arc(01, 0, 18, 18, radians(180), radians(360));
endShape();
popMatrix();

popMatrix();

//rock
fill(60);
pushMatrix();
translate(250,y);
beginShape();
vertex(0,0);
vertex(8,8);
vertex(18,14);
vertex(25,19);
vertex(40,24);
vertex(45,27);
vertex(60,22);
vertex(50,15);
vertex(40,12);
vertex(30,8);
vertex(25,4);
endShape(CLOSE);
popMatrix();

}

//rock movement
void keyPressed() {
if (y>=-60) {
y+=5;
}else{
y=-60;
}
}